
The easiest technique to get a knit look texture is slip stitch crochet. Traditionally a slip stitch is used to join together rounds or to add invisible stitches. You can crochet an entire piece using slip stitches to create knit look crochet. Here are videos and 6 free crochet patterns to help you learn how.
I’ve been a little obsessed with knit look crochet. It was the inspiration and push that started my pattern designing adventure.
One of the simplest techniques to achieve the swoon-worthy knit texture is slip stitch crochet.
Traditionally a slip stitch is used to join together rounds of crochet or to add invisible stitches. You can also use slip stitches to crochet an entire hat, scarf, or really anything.
The stitch is worked the exact same way, but there are a few tips that can make slip stitch crochet easier.
The short crochet stitch can create multiple looks just by changing where you insert the hook. We’ll talk more about that below, first let’s learn the basics of a slip stitch.
How To Slip Stitch Crochet
- Insert your hook into the stitch.
- Yarn over and pull through the stitch and through the one loop on your hook (all in one motion)
You can see slip stitching is very simple. Because you only yarn over once the height of the slip stitch is short and the tension is tight.
 Tips For Slip Stitch Crochet Success
- Keep your tension loose. Slip Stitches are a tight stitch. It should be easy to insert your hook.
- Use a bigger hook. If you are making a hat or garment, use a hook that is almost double the recommended size for your yarn. This will keep the stitches loose & help keep your edges from rolling. If you are crocheting a homeware piece that needs a sturdy fabric choose a hook 1 or 2 sizes larger than recommended.
- Count your stitches. The last stitch of the row likes to hide. Check your stitch count!
- Your work will shrink. Start with a longer beginning chain. As you crochet rows the work tightens. I’ve found after 6-8 rows the shrinking stops and your piece will stay that width.
- Enjoy the process. The slip stitch is slow to grow. It can take quite a few rows before you start to see your design. Wine helps 🙂
Front and Back Loop Slip Stitch Crochet
One of the fun things about crochet is how easy it is to change the look of a stitch, by simply inserting the hook into a different spot.
Crocheting into the back loop only (BLO), creates a “v” texture similar to the center single crochet stitch.
The difference is the slip stitches are worked in rows and create a soft and stretchy texture. The stitch is reversible, it looks the same on both sides of the fabric.
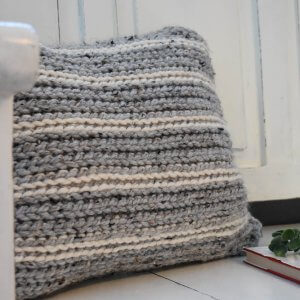
The back loop only slip stitch is perfect for crocheting hat bands or anything you want to have a slightly ribbed look.
The center single crochet is best worked in the round and creates a dense thick texture that isn’t stretchy.

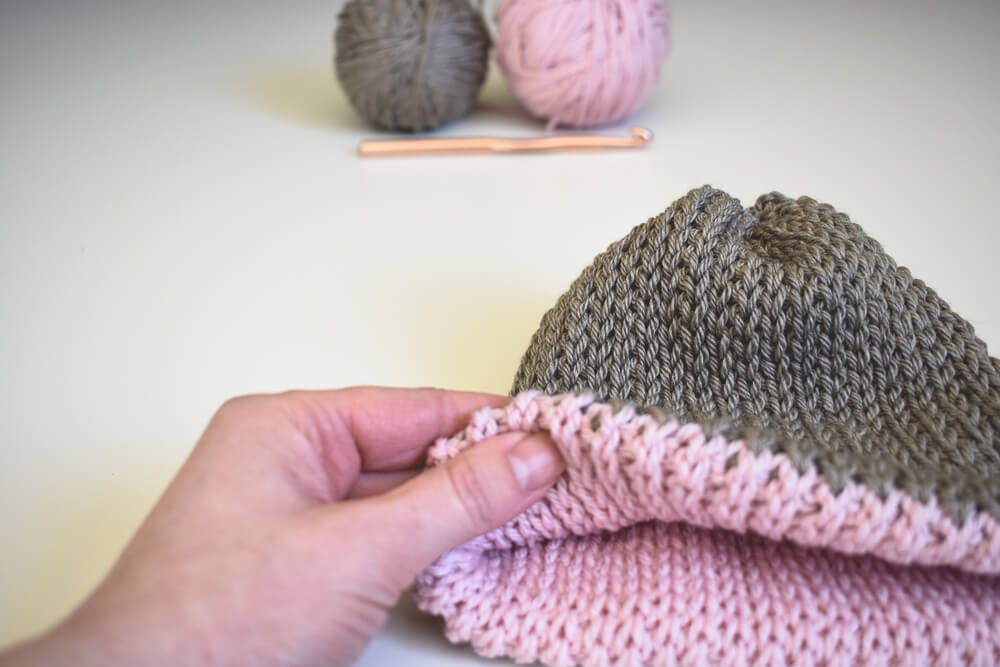
In the ribbed beanie crochet pattern, we slip stitch 1 row in the front loops and the next row in the back loops. This creates a completely different texture.
With this technique, the front and back sides of the beanie have a unique look.

You’ll also love these unique crochet stitches to take your project up a notch.
A Common Mistake Most Crocheters Make
In this crochet video tutorial, you’ll learn how to slip stitch crochet in the back loops. The same technique applies to slip stitching in the front loops.
Since the slip stitch is such a short stitch it can be hard to tell where your 2 top loops are. The 2 top loops of any stitch form a “v” or little heart shape. This is where you insert your hook for any traditional stitch.
After you have worked 1 row of slip stitches, before you turn your work, look at the direction the v’s are facing.
Turn your work. You can now see the v’s are going the opposite direction.
If you turn your work to the side you can see another set of v’s. This is not the correct loops to work into. You can tell by the direction the v’s are facing.
If you look closely you see they’re facing the same direction you’re working this row.
Find the top loops that are facing the opposite direction you are working now and begin slip stitching.
More or Less
Increasing and decreasing with slip stitch crochet is the same as traditional stitches.
- Increase: Work 2 slip stitches in the same stitch.
- Decrease: Slip Stitch 2 Together (insert hook into stitch, insert hook into 2nd stitch (you will have 3 loops on the hook), YO, pull through all the loops on the hook.)
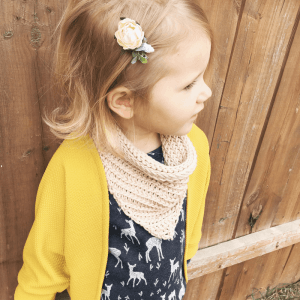
In the Canyon Triangle Scarf Crochet Pattern, you decrease along the edges to create a modern triangle shape. You can watch this video How To Decrease When Slip Stitch Crocheting for more information.
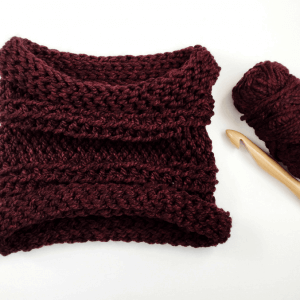
Modern Slip Stitch Crochet Patterns
Now that you know every little detail about slip stitch crochet here are my favorite patterns for you to try.


how do i join new yarn for row 3 of pattern when using the slip stitch ribbing?
Thank you so much for this complete guide ! It will be very usefull for me since I found center single crochet too tight to make clothes with it (but it’s perfect to make baskets !). I just love this knit like crochet. ♥
You’re so right! The center single crochet stitch is really tight. The slip stitch is a great alternative.
Stay cozy,
Sierra