
A simple free crochet headband pattern that will be your go-to for fall. The Twist and Shout Head Wrap is a basic design that creates a thick and warm headband perfect for fall and winter. You can make matching mommy and me sets with this free crochet pattern.
Some days there just isn’t enough dry shampoo to save my hair. The Twist and Shout Head Wrap to the rescue. I can throw it on and drop the kids off at school, messy hair and all.

I love the look of a wide headband that’s almost a hat but definitely not a messy bun beanie. The twist adds a little fun to the classic head wrap.
This stretchy crochet headband is made with light worsted weight yarn. You will crochet a large rectangle, twice as wide as the finished wrap. Then fold it in half to create a warm and cozy head wrap.

All the details are below for the free crochet pattern. The pattern comes in kid and adult sizes. Mommy and me sets are the cutest!
If you have a different yarn you’d like to use this pattern is easy to modify. The rectangle dimensions are given for each size. Make row 1 long enough to wrap around your head. Then continue crocheting rows until the rectangle matches the measurements given for your size.

It’s important to use the foundation half double crochet instead of a starting chain. A starting chain will leave a tight row and cause the headband not to stretch. I found this video helpful in understanding the foundation stitches.
One final note before you start the pattern. Now is the time to sharpen your seaming skills. For a long time, I only slip stitched my seams together. It worked but always left a bulky seam. In this head wrap, the seam will be seen in the front of the headband. Try the mattress stitch to get an invisible yet strong seam. It’s easier than you think.
The Twist and Shout Crochet Headband Pattern
What You Need
- 1 Skein of Light #4 Worsted Weight Yarn: Cloudborn Superwash Merino Worsted Twist in the color Autumn Heather. (220yds/3.5oz per skein)
- H/8-5.00mm Crochet Hook
- Tapestry Needle
- Scissors
Gauge
Read this to learn everything about gauge swatches.
14 hdc’s x 12 rows = 4” square
Helpful Tips Before You Begin
- The head wrap is made by crocheting a rectangle then sewing together. The sizes of the rectangle before sewing are given with each size. You can easily use a different yarn and crochet to the correct rectangle measurements for your size.
- For the first row use a foundation half double crochet instead of a starting chain. This will allow the head wrap to have enough stretch. If you use a basic chain your head wrap will have 1 side that is tighter.

Sizing
Kids (4-8 years): Fits head size of 19”-21”
Adult: Fits head size of 21”-23”
Abbreviations (US Crochet Terminology)
- hdc = half double crochet
- ch(s) = chain(s)
- st(s)= stitch(es)
Kids (4-8 years)
Row 1: work 63 foundation hdc’s, turn. (63sts)
Rows 2-20: ch 1, 1 hdc in each st across, turn. (63sts)
The kids’ rectangle will be 18” long x 6.5” wide.
Adult
Row 1: work 70 foundation hdc’s, turn. (70sts)
Rows 2-27: ch 1, 1 hdc in each st across, turn. (70sts)
The adult rectangle will be 20” long x 9” wide.
Sewing It All Together
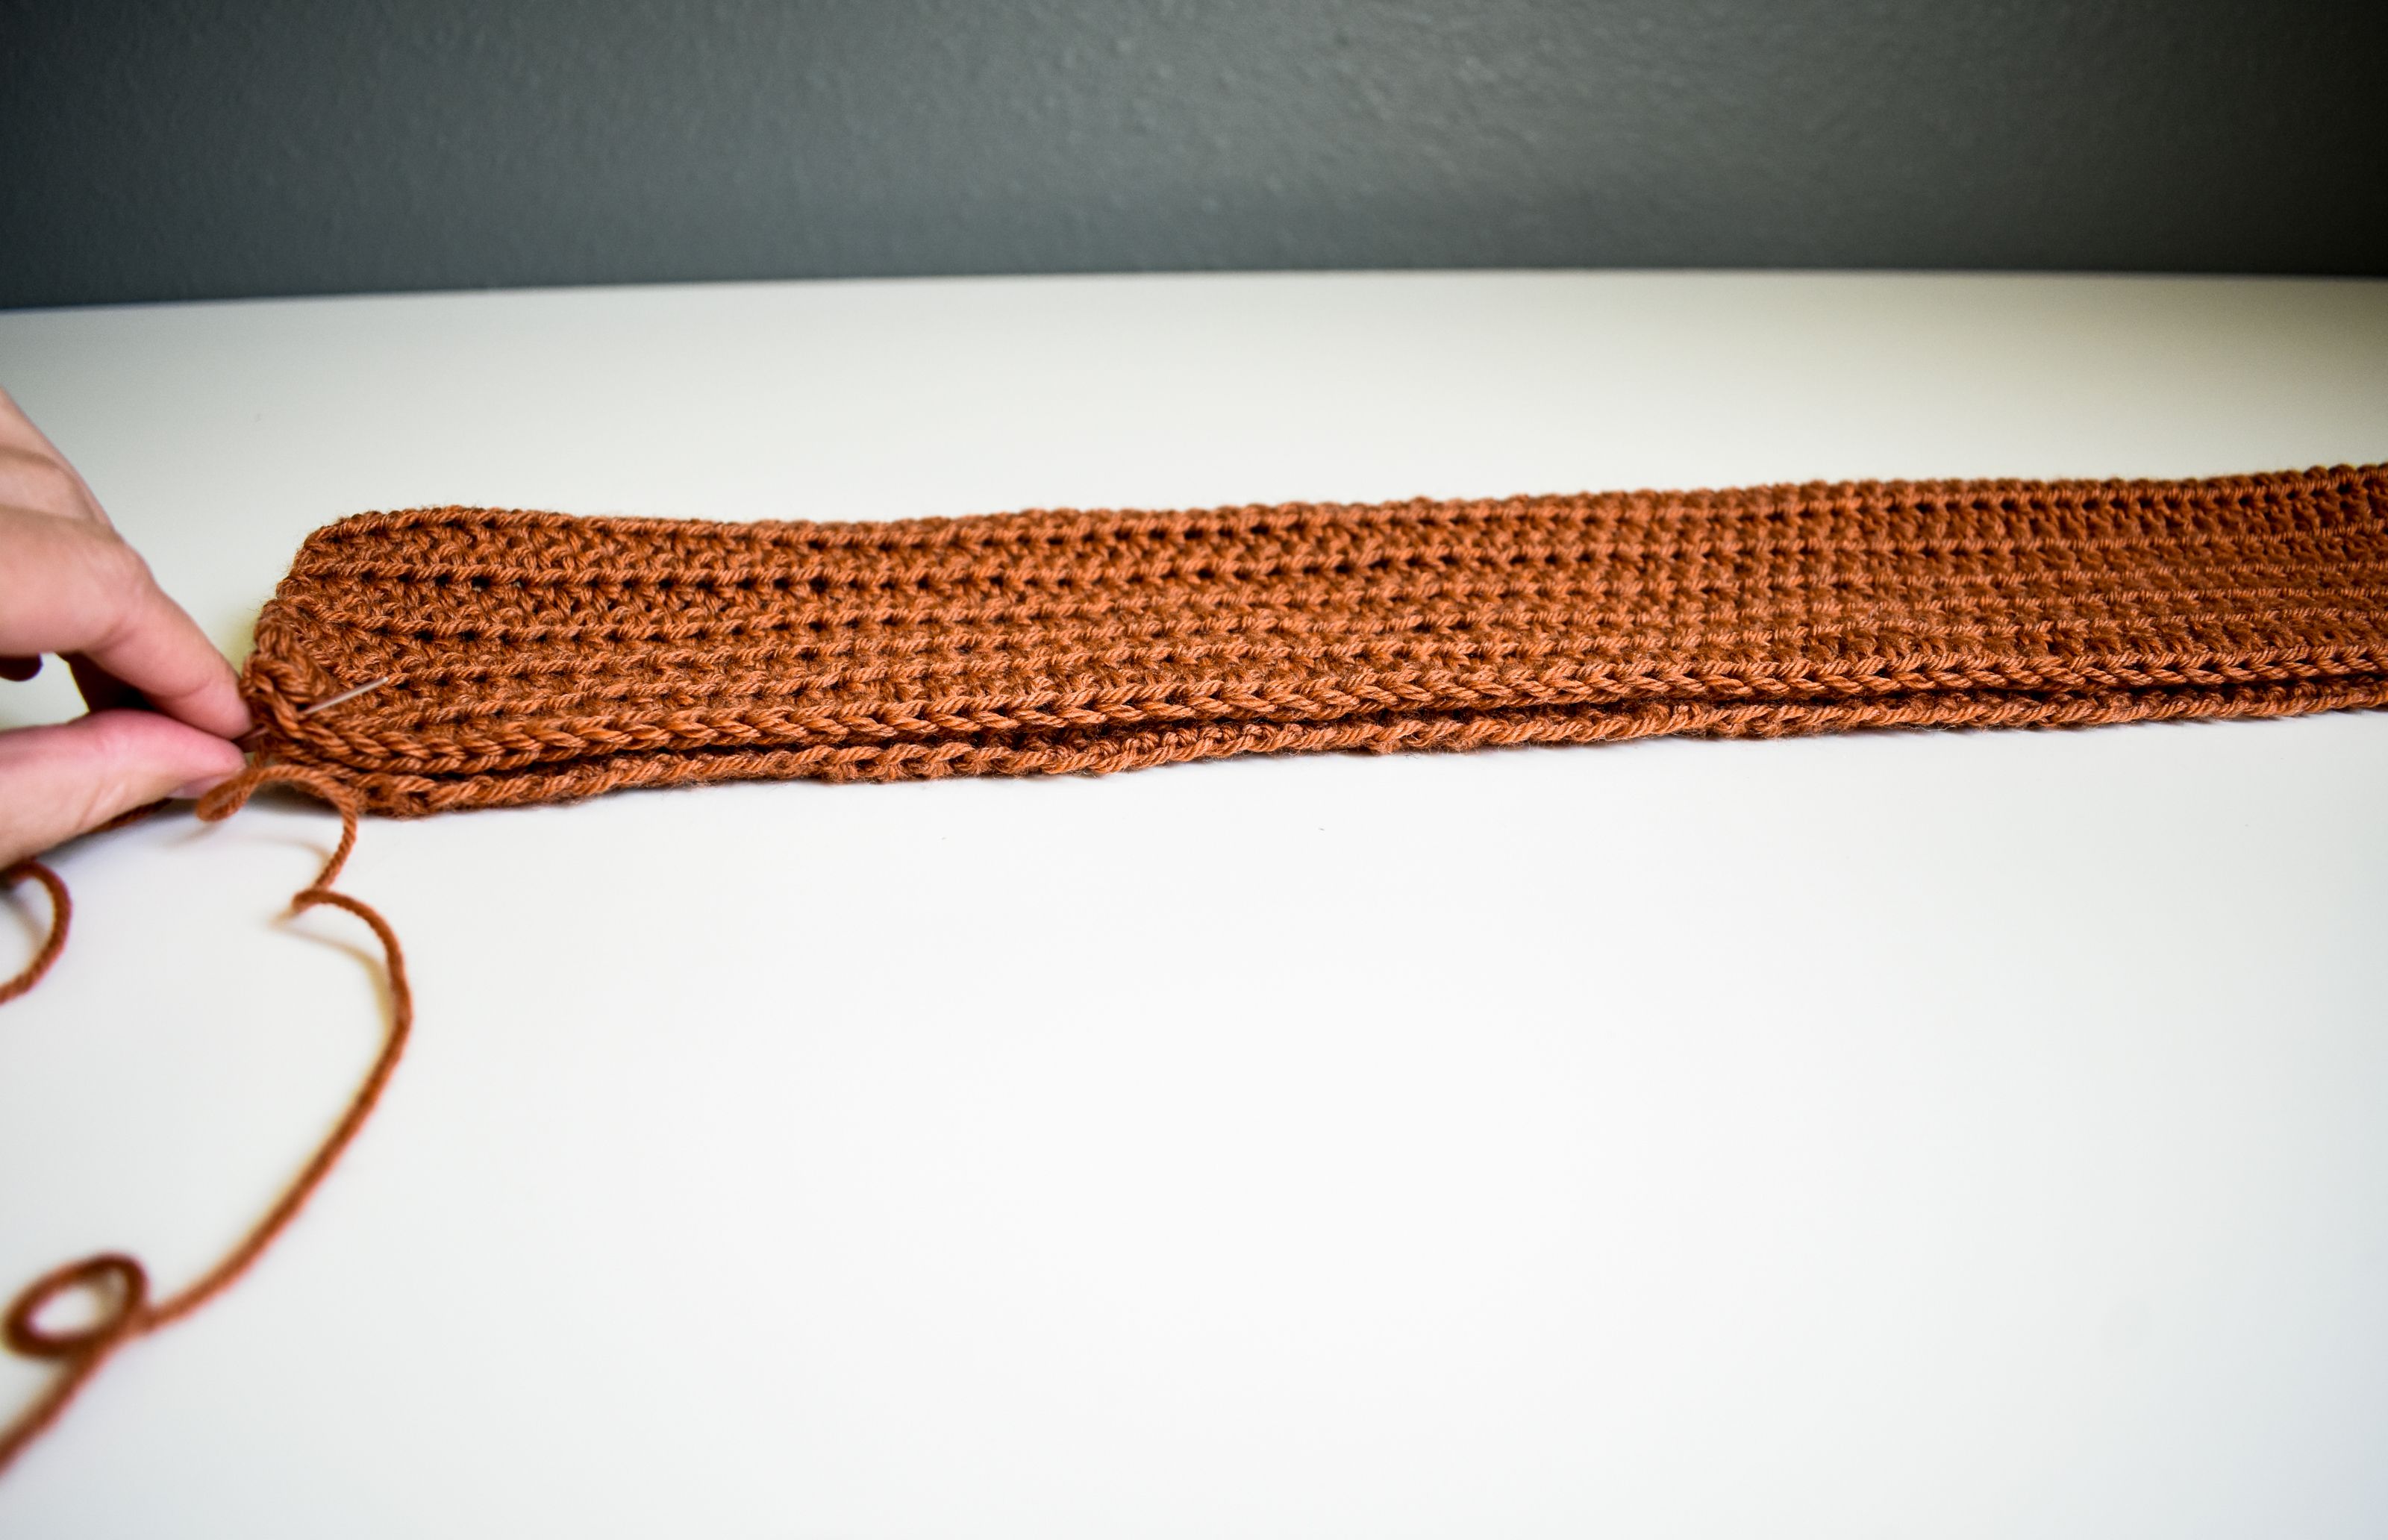
- Lay the rectangle out on a flat surface. Fold the rectangle in half, lengthwise, like a hot dog bun. Sew the 2 long edges together using the mattress stitch. I don’t recommend slip stitching the edges together. The seam will be visible on the front of the head wrap.
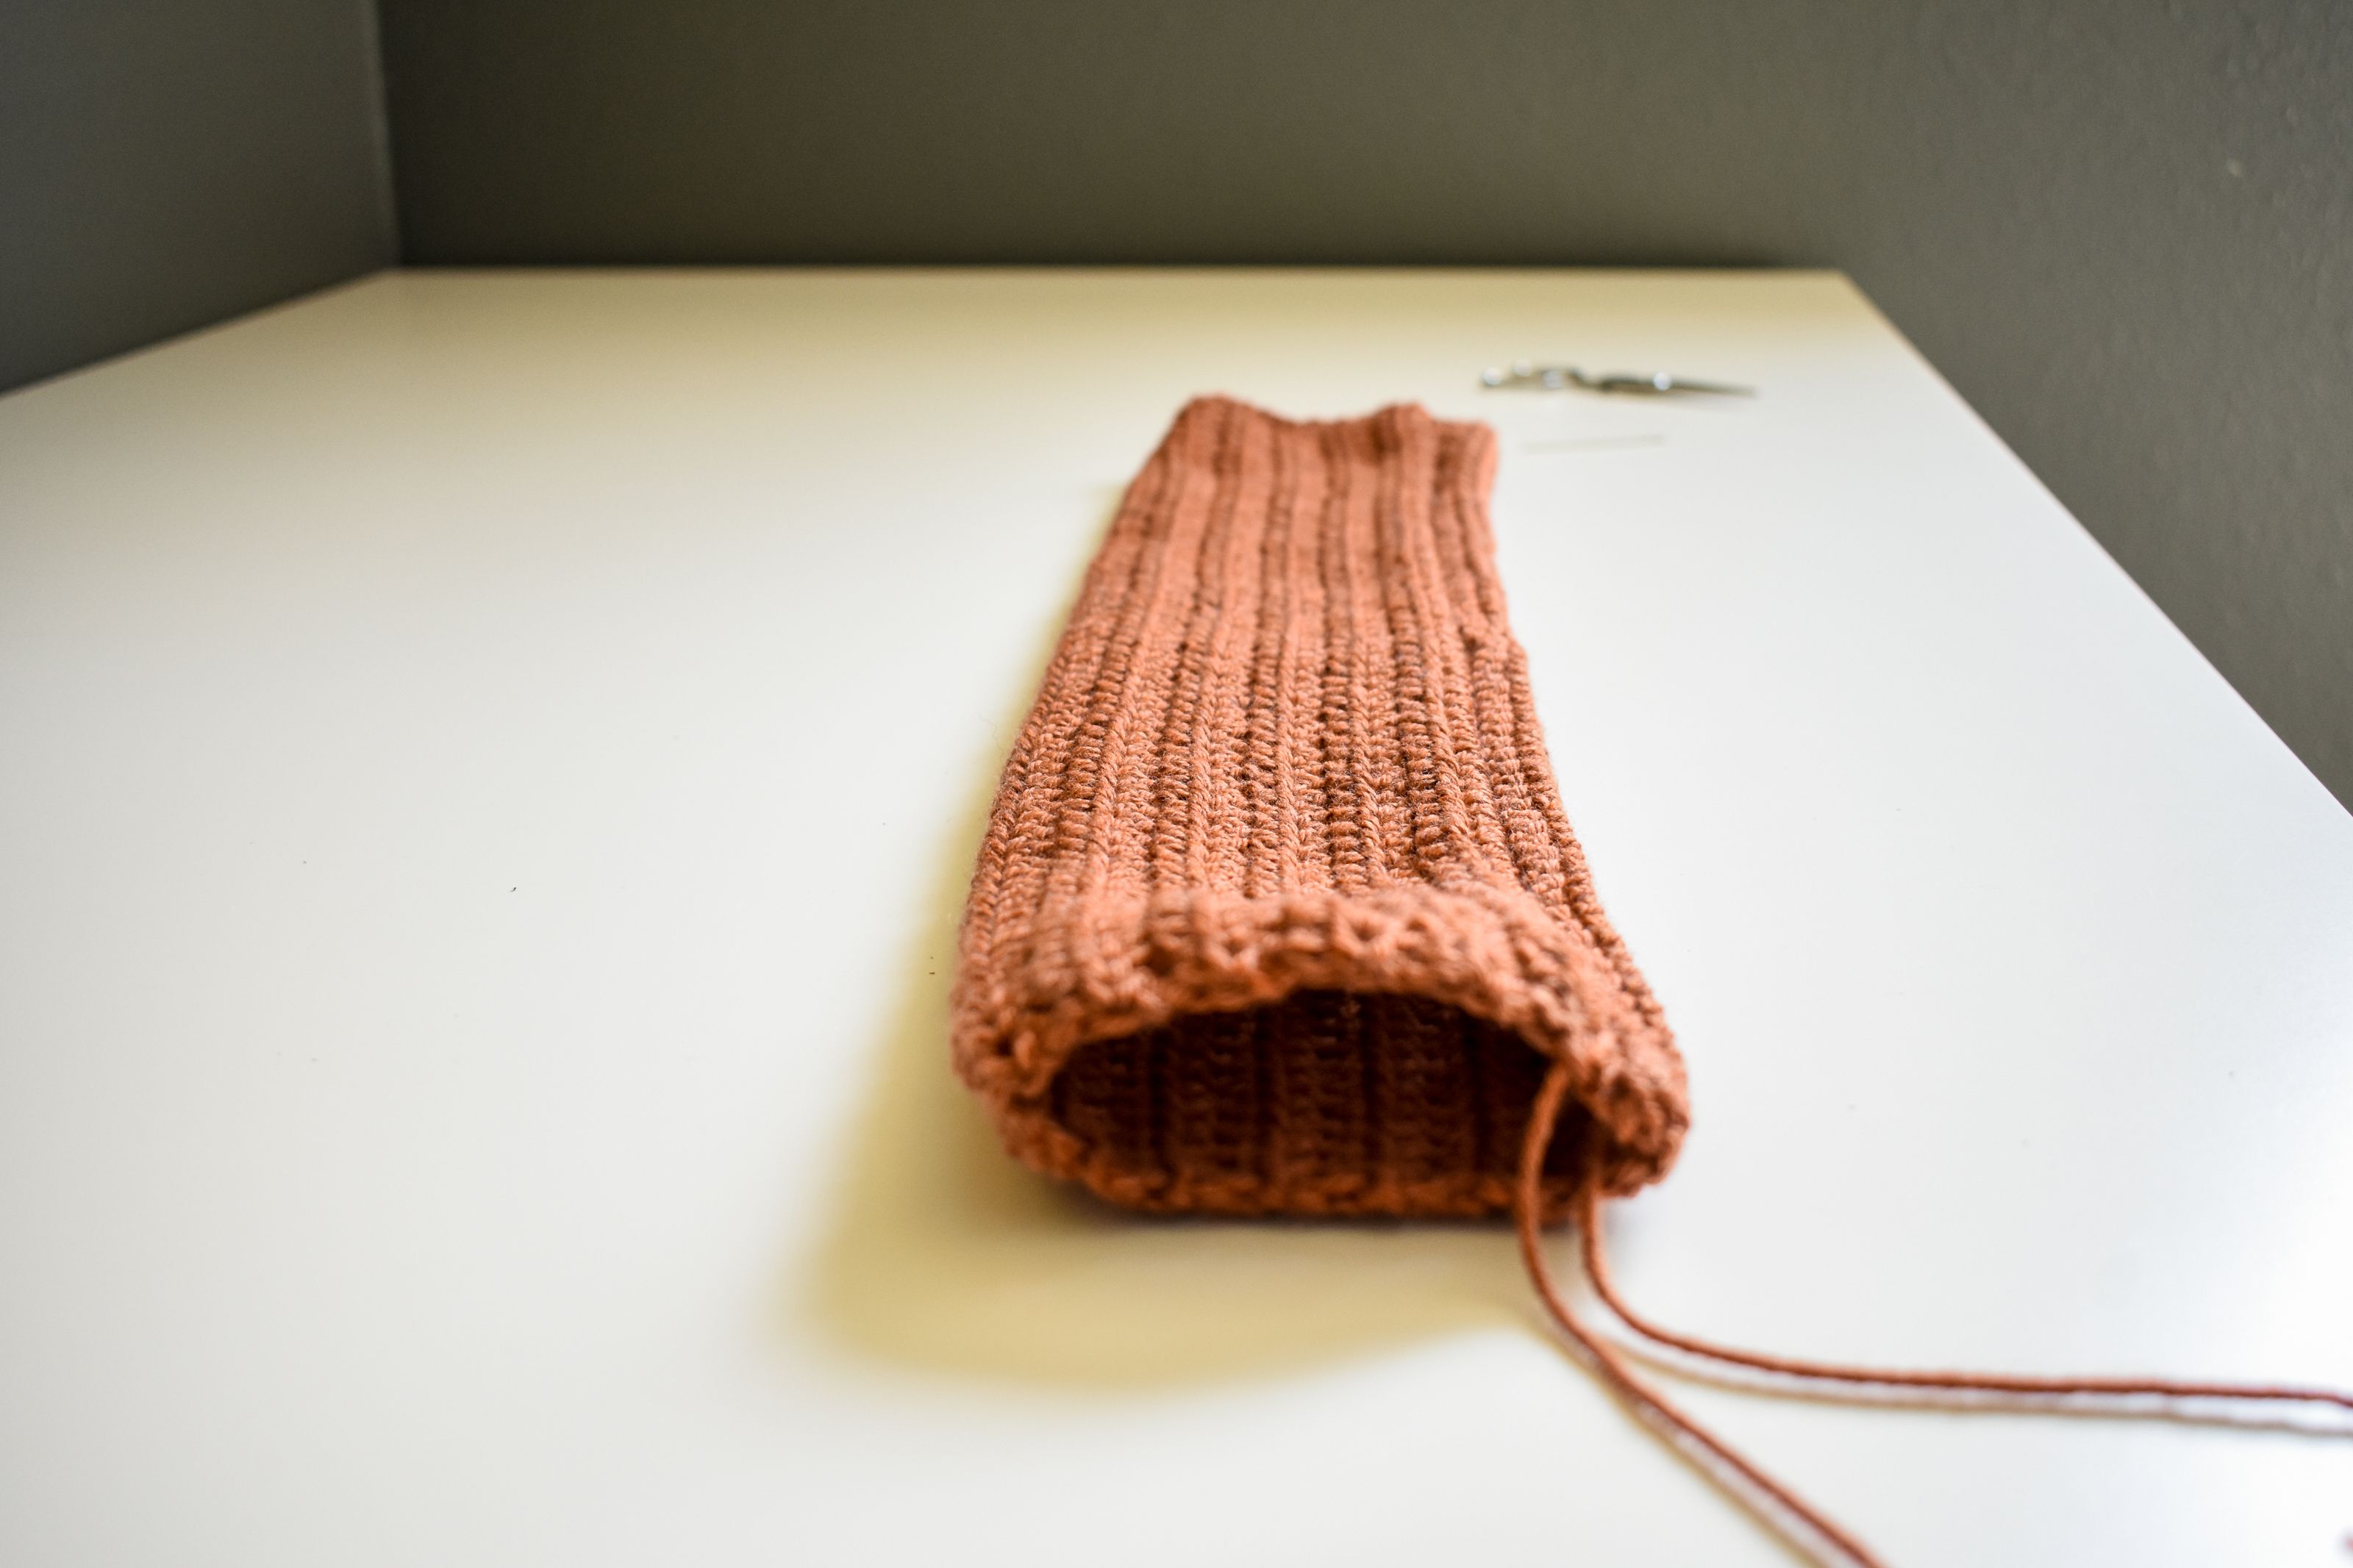
 2. Now you have a long tube with 2 open short ends. Turn the tube inside out so the seam will be facing in. Lay the tube flat.
3. Take 1 of the short ends and flip it over to create a twist in the middle of the head wrap.
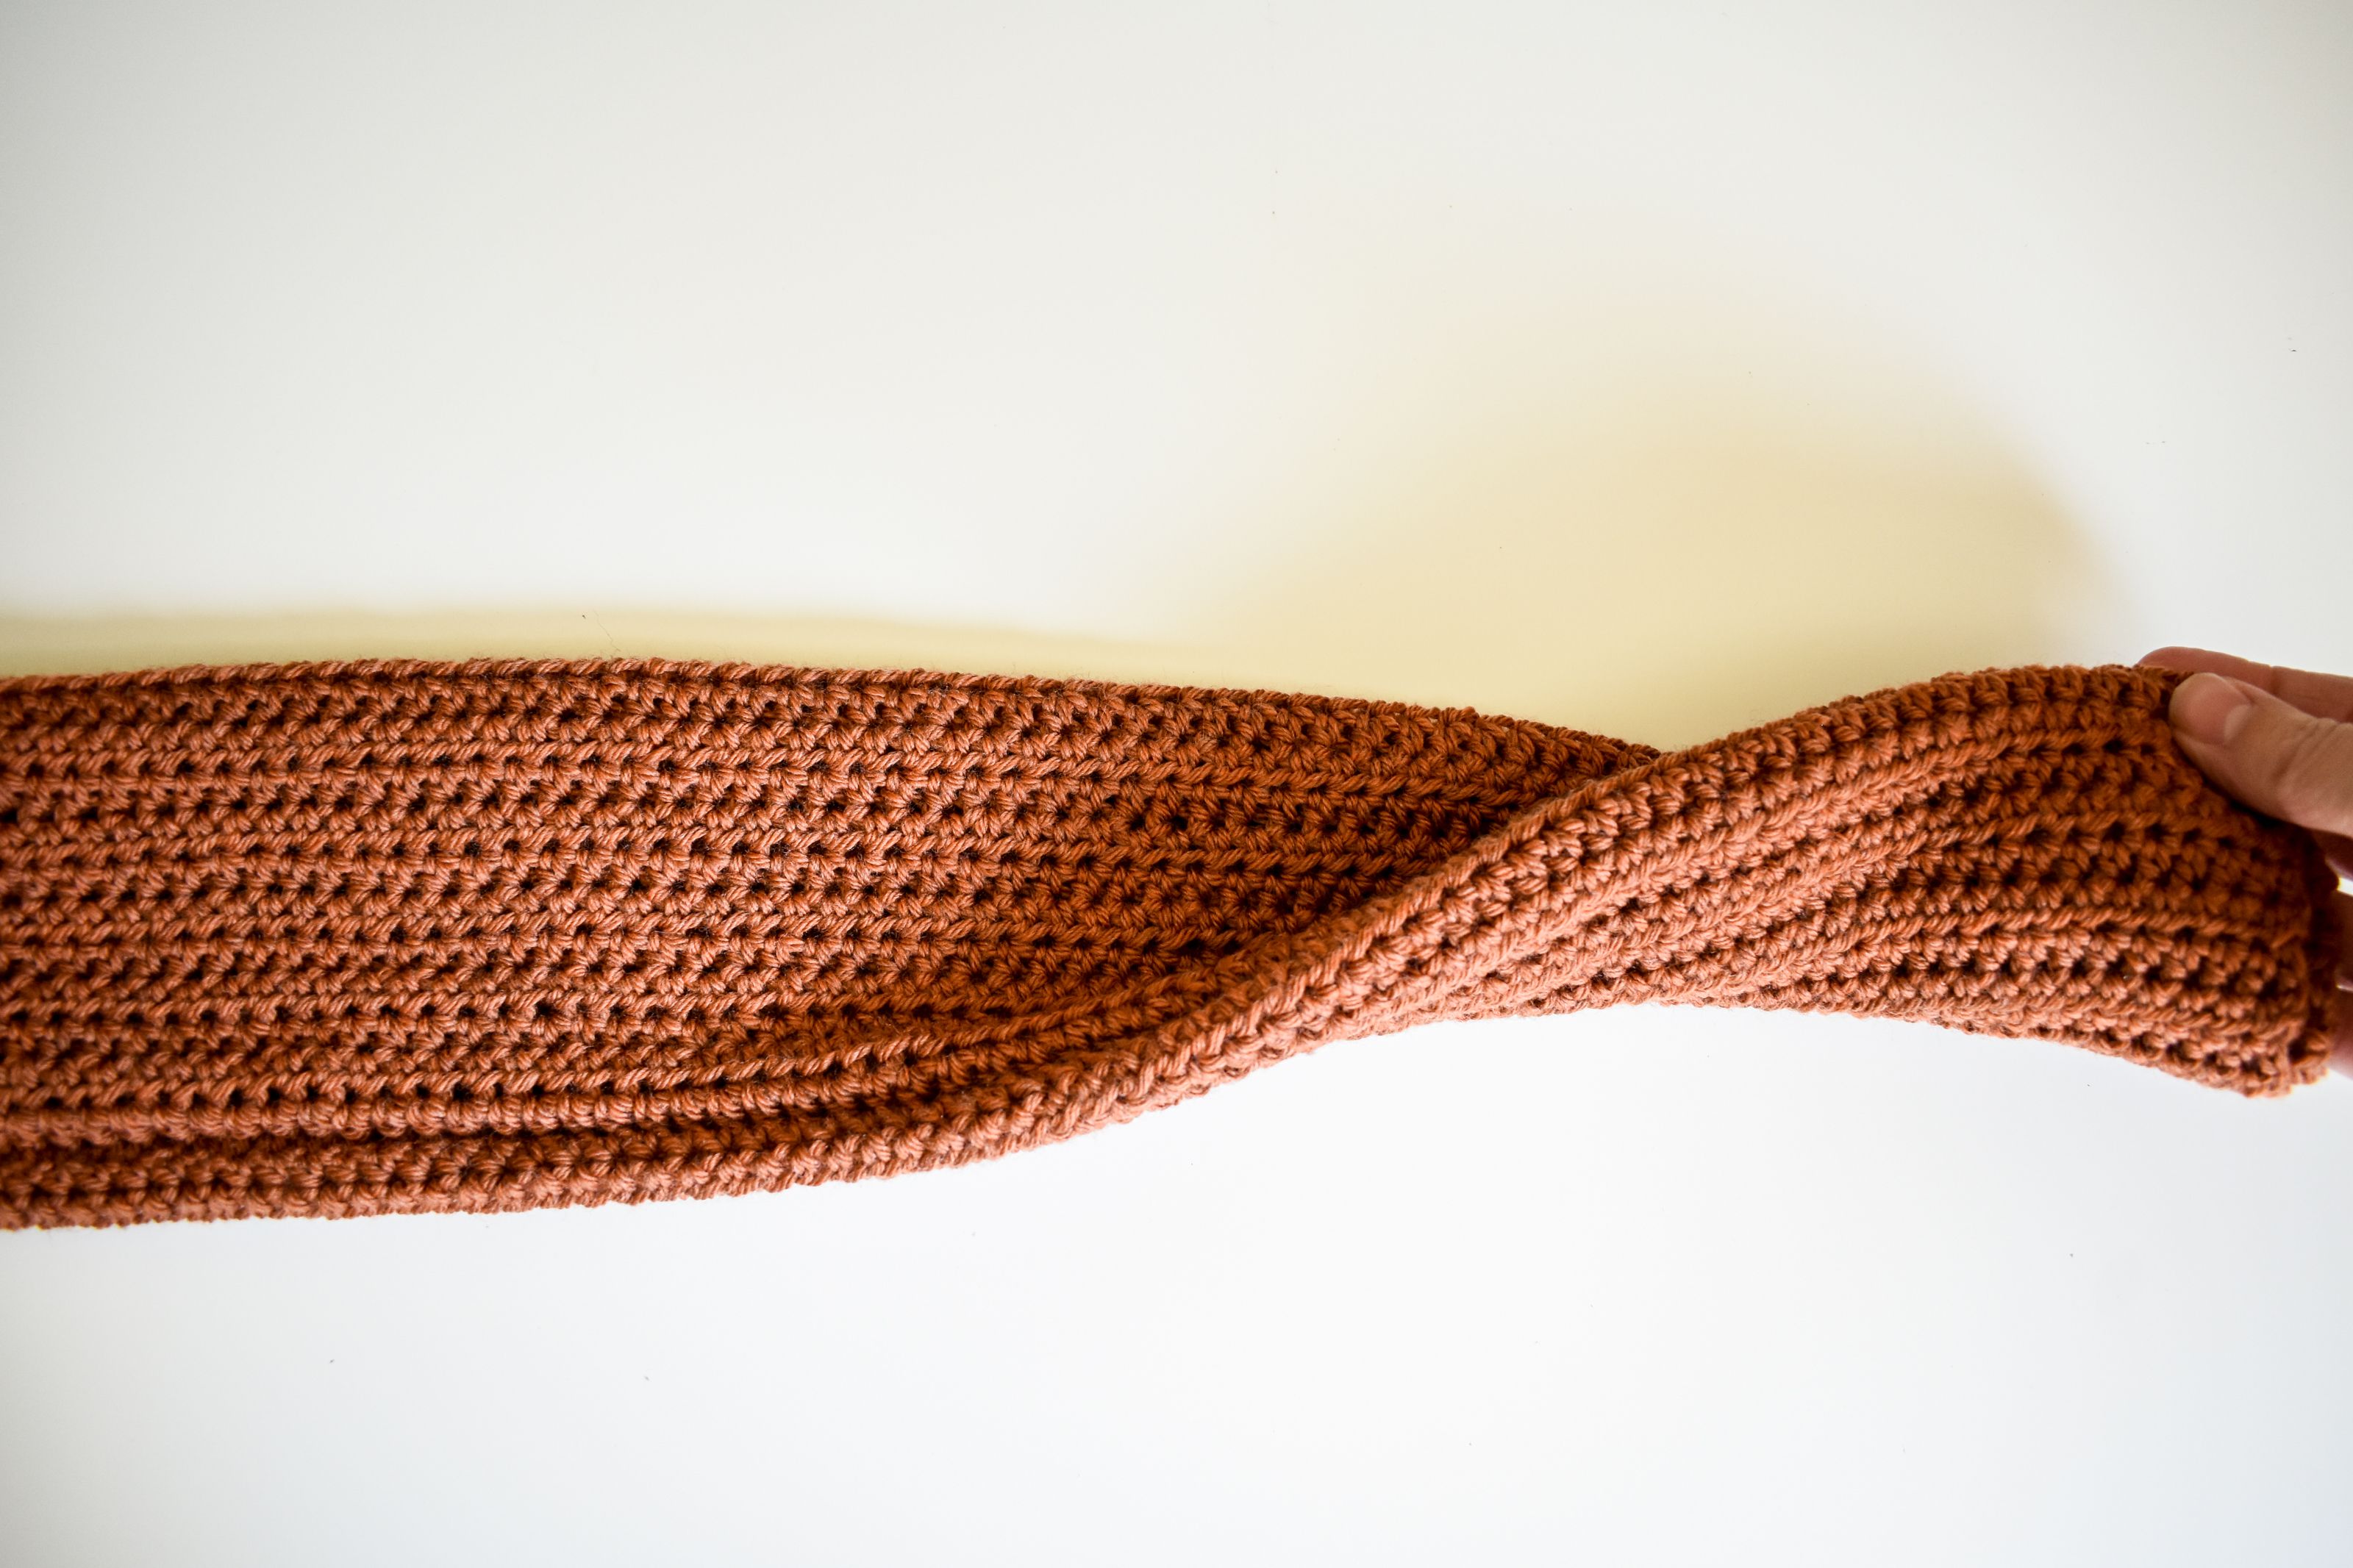
4. Take that same short end and fold it over to meet the other short end. Make sure it doesn’t untwist in the middle.

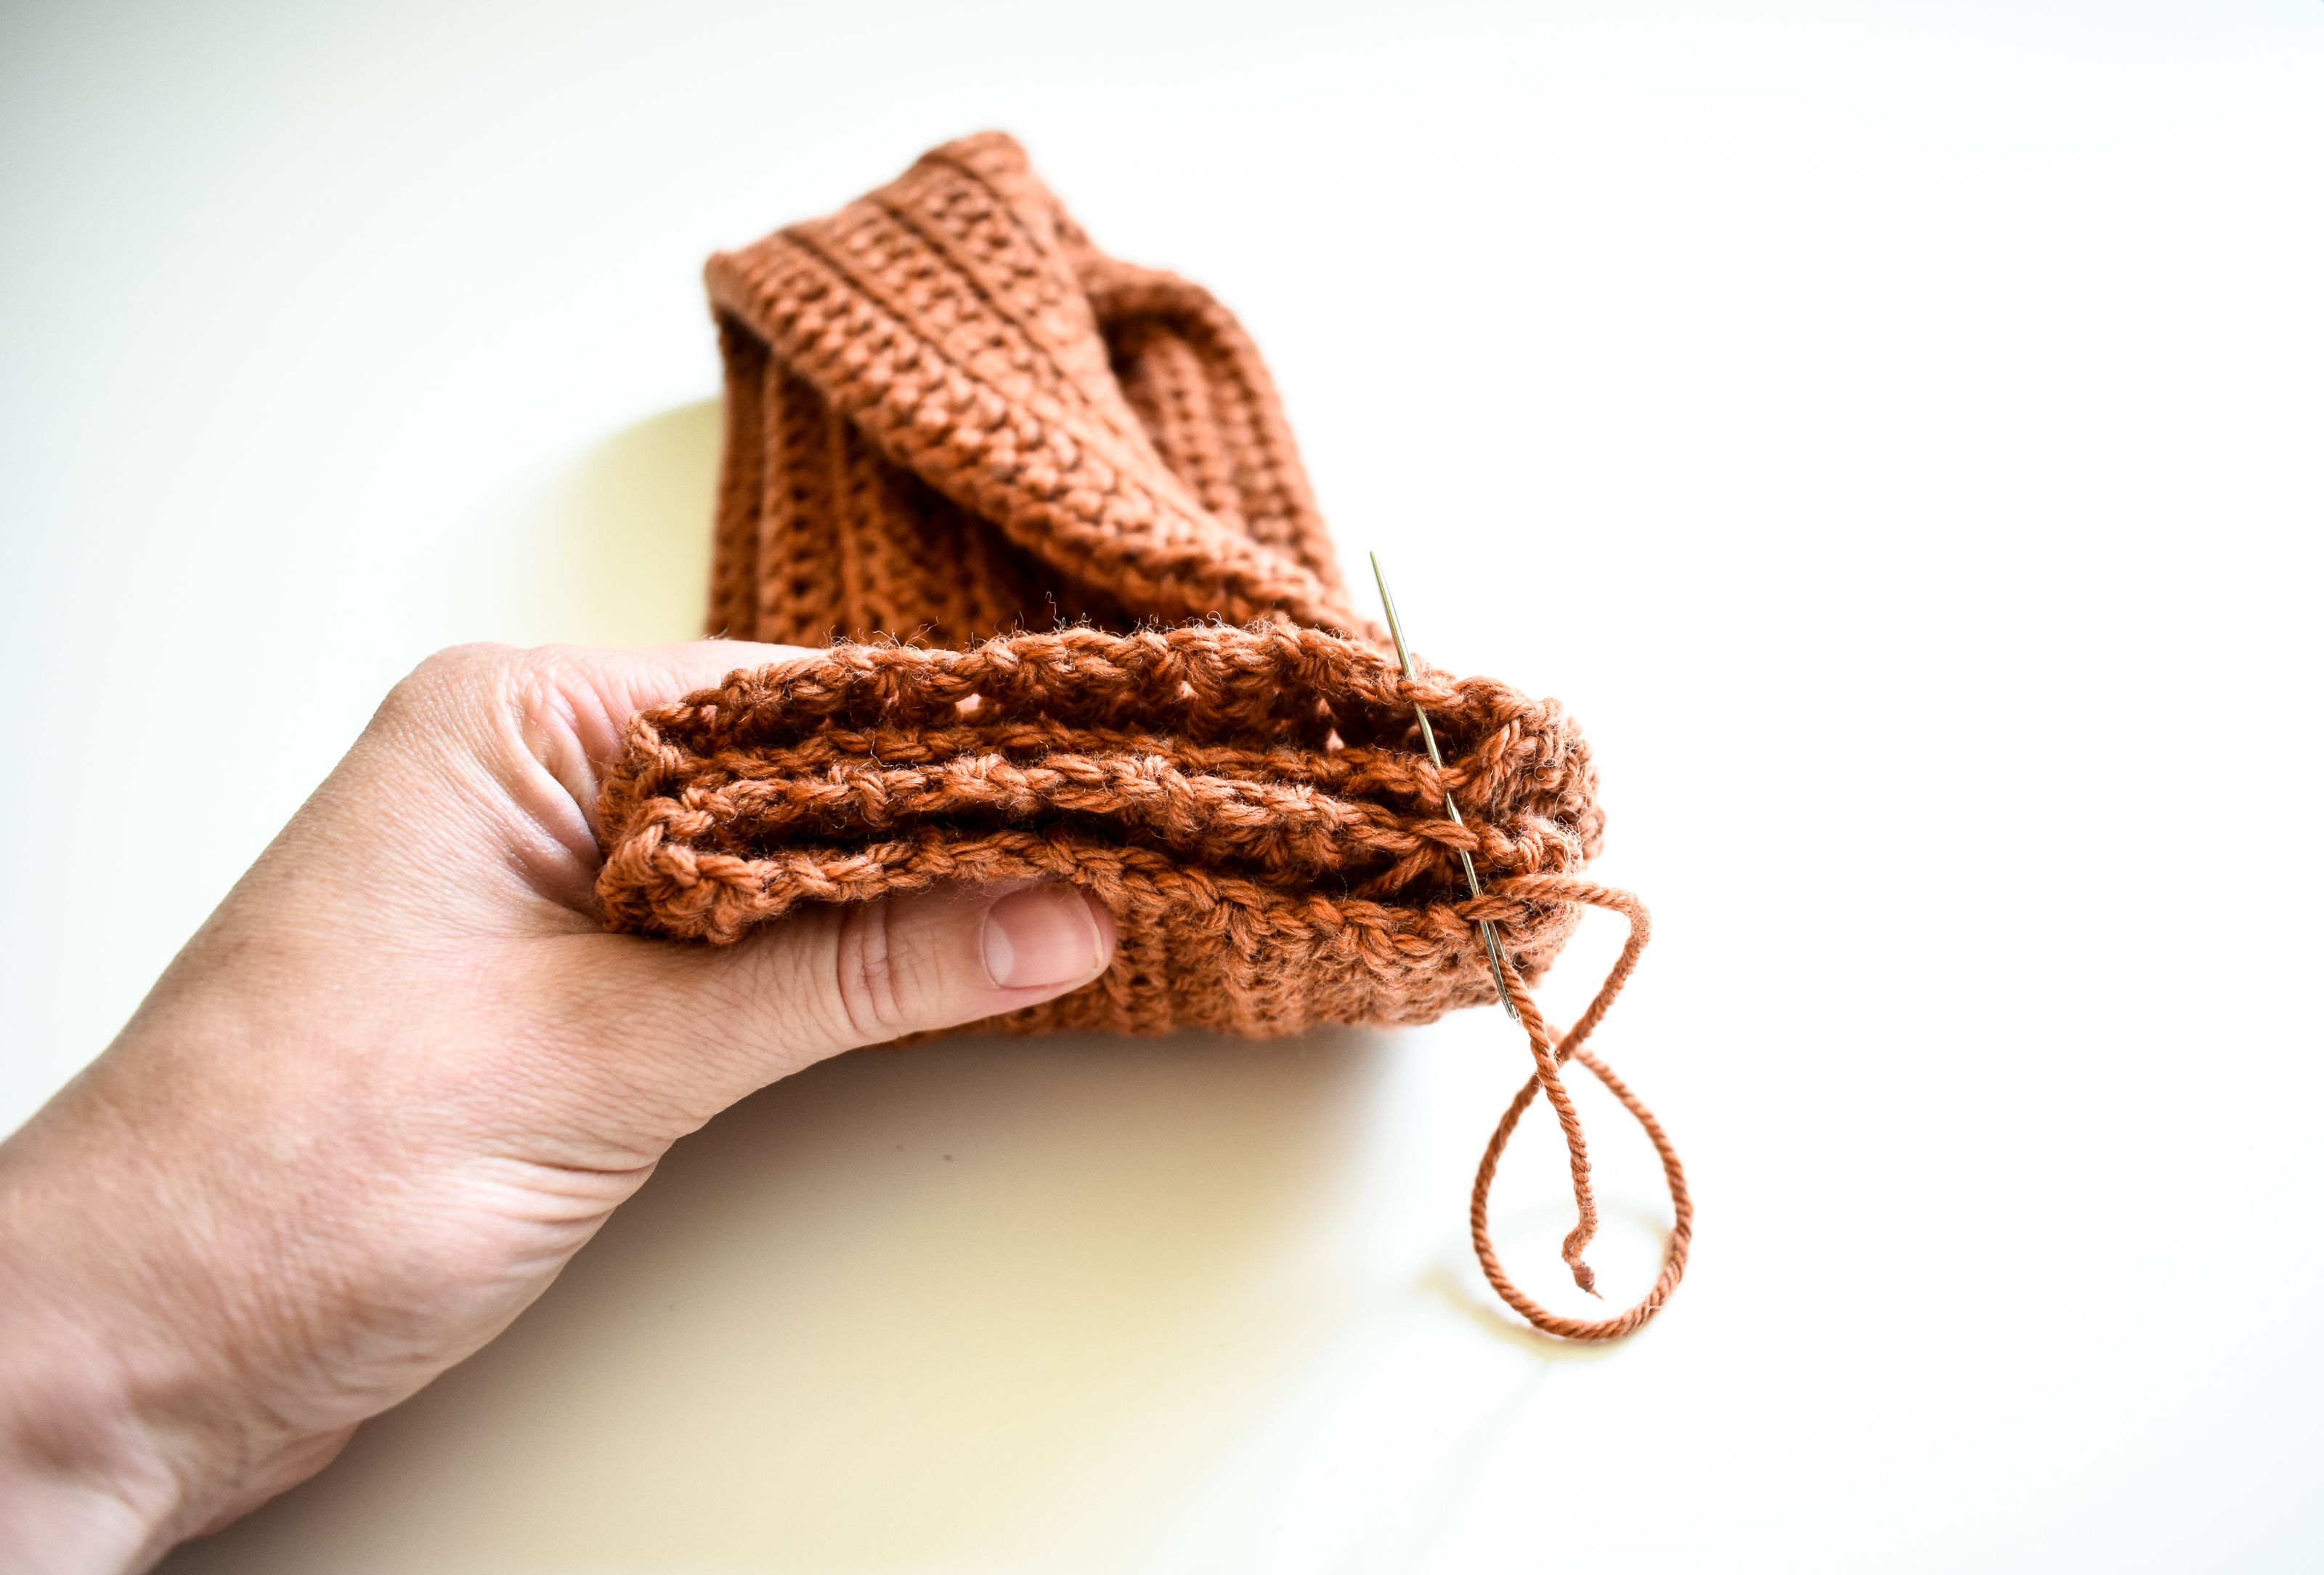
5. Sew the short ends together. Make sure to sew through all 4 pieces of the short ends.
 Now you’re ready for those mornings you don’t have time to wash your hair.
Get the free PDF pattern sent straight to your inbox.
