
I remember all the fears that were swirling around in my head before I crocheted my first sweater. Starting with a crochet toddler sweater is perfect, less yarn and time. The free toddler crochet pattern explains every detail you need to succeed at your 1st crochet sweater.
So you want to crochet your first sweater? Yay! I remember all the fears that were swirling around in my head before I crocheted my first sweater. I had been crocheting for a few years, decent at pattern reading, but still the thought of a sweater overwhelmed me.
I think the amount of yarn and time it would take was my #1 fear. What if I spent all this time and yarn only to have a giant piece of fabric that doesn’t fit right?
A crochet toddler sweater is a great way to ease yourself into garment making. Less yarn and time makes the project more do-able.

I’m here to tell you this isn’t going to be a failure. Your very first sweater might turn out less than perfect, but it won’t be a failure. You will be on your way to perfecting sweater making.
Failure is success if we learn from it.-Malcolm Forbes
The very first sweater I crocheted turned out OK. Not amazing, just ok. My seaming technique left much to be desired. But my Everly wears her sweater with pride. Like a big warm hug, the sweater brings her comfort knowing mom made it just for her.
The Bell Crop Crochet Toddler Sweater Pattern has been written for the “scared to take on a sweater” crocheters. All the details about gauge and sewing it all together is explained step by step for you.
Most of my pattern testers had never made a sweater before. ” I love how you explained EVERYTHING” was the most common response from them. You can see some of their first sweaters on Instagram @sweeteverlyb
Save the pattern to your Ravelry Favorites.
Pin it for later.Are you convinced to try this? Let’s dive into the details of this crochet toddler sweater.
This free crochet pattern is for the toddler size (2T-6T). This sweater pattern is also available in girls and women’s sizes.
What You Need For This Crochet Toddler Sweater
- #4 Worsted Weight Yarn: I used Cloudborn Superwash Merino Worsted Twist in the color Autumn Heather (toddler) and Shaela Heather (adult). (3.5oz/220 yds per skein) *Please note: This yarn is on the thinner side of worsted weight. Here’s a great site that helps you find a yarn substitute. yarnsub.com
Other Yarn Substitutes - Berroco Ultra Alpaca
- I Love This Yarn
How Much Yarn Do You Need?
2T 2 Skeins/350 yards
4T 3 Skeins/450 yards
6T 3 skeins/500 yards
- K-10.5/ 6.5mm Hook
- Tape Measure
- Blocking Materials: Foam blocks, T-pins, Water Bottle
- Tapestry Needle
- Scissors
The # 1 Thing That Will Make Or Break Your Sweater
I could’ve titled this section “Gauge” but I know you would’ve skimmed over it, just like I used to do (and sometimes still, shhh). Taking the extra time to make a gauge swatch is painful. You just want to dive into the project. I get it!
But please, make the swatch. It will save you the headache of a sweater that’s fit for a giant or too small to go over your toddler’s head. If you want to learn more, here’s a detailed crochet gauge tutorial.
To make checking gauge tolerable I picked up a wooden gauge measuring tool.
Crochet Gauge
12 sts and 11 rows = 4” square
Pattern for gauge swatch
ch 19
Row 1: 1 hdc in 2nd ch from hook, 1 hdc in each ch across, turn. (18sts)
Rows 2-17: ch 1, 1 hdc in the first st, 1 hdc in each st across, turn. (18sts)
After completing the swatch lay it on a hard, flat surface. Use a ruler or gauge measuring device to measure the number of stitches.
Place the ruler horizontally across the center of the swatch. Count the number of stitches that fit into 4”. This is your stitch gauge. It should equal 12 stitches.
Place the ruler vertically along the swatch and count the number of rows that fit into 4”. This number is your row gauge. It should equal 11 rows.
Helpful Tips
- The swatch should be larger than the 4” you need to measure.
- You’ll only measure the interior stitches, not the stitches or rows along the edges of the swatch.
- Remember half stitches count too.
- If you matched gauge on your first try you can start your project!
If you have more stitches and rows than the gauge pattern your finished sweater would be too small. Use a larger hook and swatch again.
If you have fewer stitches and rows than the gauge pattern your finished sweater will be too big. Use a smaller hook and swatch again.
Abbreviations (US Crochet Terminology)
hdc = half double crochet
ch(s) = chain(s)
st(s) = stitch(es)
” = inches
Sizing
Choose the size that matches the closest to your bust measurements. Here’s a helpful chart that shows you how to take your measurements. Craft Yarn Council Measuring Chart
Actual Body Measurements
2T Bust 21″ Sleeve 8.5″
4T Bust 23″ Sleeve 10.5″
6T Bust 25″ Sleeve 11.5″
Pattern Notes
You’ll begin each row with a chain 1, doesn’t count as a stitch, and your first half double crochet will be worked into the very first stitch. The last half double crochet in each row will be worked in the final stitch, not the turning chain.
Toddler Crochet Sweater Size 2T 4T 6T
The pattern is written for the 2T size with the directions for the other sizes in parenthesis as follows 2T(4T,6T)
Front and Back Panels
The finished size of 1 panel
2T: 13.5” wide x 9.5” long
4T: 14.5” wide x 10.5” long
6T: 15.5” wide x 11.5” long
Ch 41 (44,47)
Row 1: 1 hdc in 2nd ch from the hook, 1 hdc in each ch across, turn. 40(43,46)sts
Rows 2-26(29,32): ch 1, 1 hdc in the first st, 1 hdc in each st across, turn. 40(43,46)sts
- To make a longer sweater continue crocheting rows. Make sure you crochet the same number of rows for both the front and back panels.
- Cut the yarn and sew in the ends.
Repeat these steps above to make the 2nd panel.
Sleeves
The finished size of 1 sleeve
2T: 8” long x 8.5” wide at the narrowest end x 14.5” wide at the widest end.
4T: 10” long x 9” wide at the narrowest end x 15” wide at the widest end.
6T: 11” long x 9.5” wide at the narrowest end x 15.5” wide at the widest end.
Ch 26 (28,30)
Row 1: 1 hdc in 2nd ch from the hook, 1 hdc in each ch across, turn. 25(27,29)sts
Rows 2-4(9,12): ch 1, 1 hdc in the first st, 1 hdc in each st across, turn. 25(27,29)sts
Row 5(10,13): ch 1, 2 hdc in the first st, 1 hdc in each st across until the final st, 2 hdc in the final st, turn. 27(29,31)sts
Row 6(11,14): ch 1, 1 hdc in the first st, 1 hdc in each st across, turn. 27(29,31)sts
Rows 7-22(12-27,15-30): Alternate between repeating row 5(10,13) and row 6 (11,14) The final stitch count will be 43(45,47)sts.
- Cut the yarn and sew in the ends.
Repeat these steps above to make the 2nd sleeve.
Sewing It All Together
You’re almost done!
I recommend blocking each piece separately, before you seam it all together, to the final measurements given in the pattern.
After blocking you can start seaming the front and back panels together. Both sides are interchangeable. Place the front panel on top of the back panel. The panels were crocheted from the bottom to the top. Make sure the bottom, where your starting chain is, of each panel is together.
Shoulder Seams
- Attach your yarn to the top, outside edge of one panel.
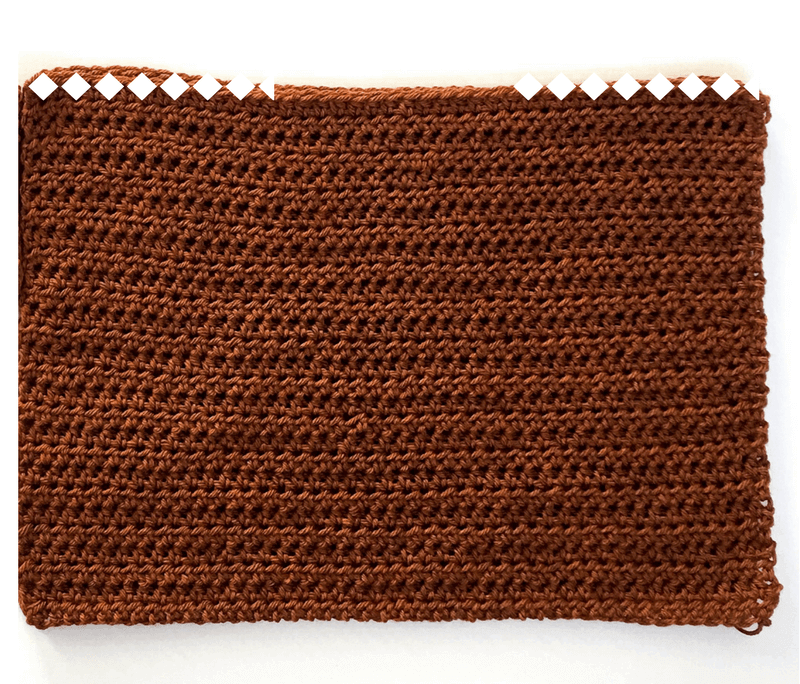
- Using a mattress stitch, sew the front and back panels together until your seam measures 4”(along the white dotted line in the picture above).
- Cut the yarn and sew in the end.
- Repeat these steps along the other shoulder seam. You will have an open space in the center for your neck. Make sure the hole is large enough to slip over your head.
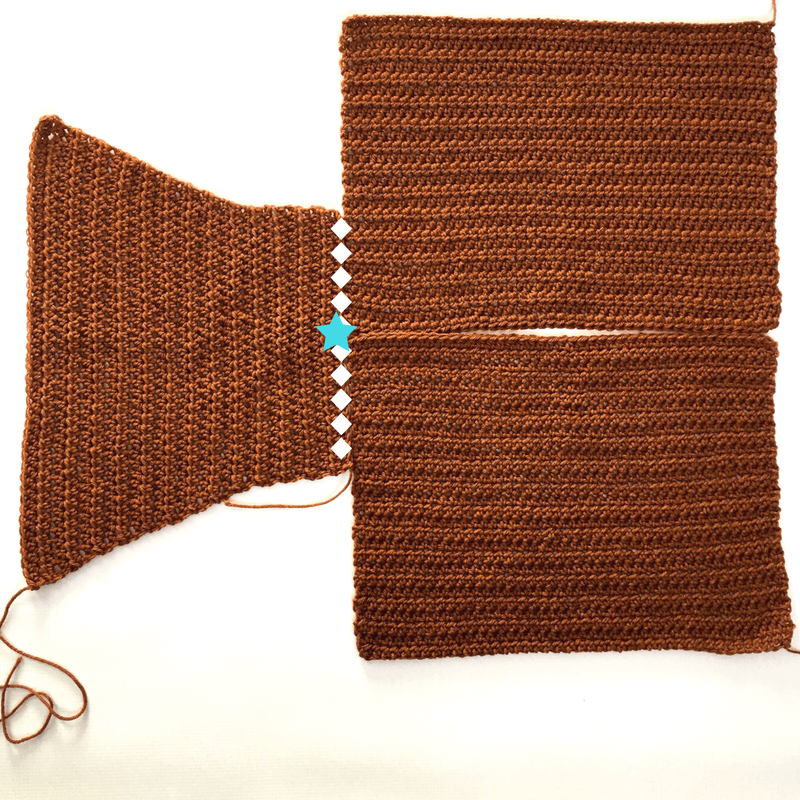
Sleeves
- Open the front and back panels and lay them flat. It will be a long rectangle.
- Fold your sleeve in half lengthwise, like a hotdog bun.
- Find the middle stitch along the narrow end of the sleeve.
- Match the middle stitch up to the edge of the shoulder seam (by the star in the photo above). Use a stitch marker or pin to hold it in place. Lay the sleeve panel flat.
- Using the mattress stitch, sew the narrow edge of the sleeve on to the edge of the front and back panels (along the dotted line in the photo above).
- Cut the yarn and sew in your ends.
- Repeat these steps above to attach the other sleeve.
Side Seams
- Pick up the sweater by the shoulder seams. Fold the garment in half, so it looks like the finished sweater. The front panel will be on top of the back panel. The sleeve panels will be folded in half. Line up all the corners.
- Using the mattress stitch, sew together the side seams and the underside of each sleeve (along the dotted line in the photo below).
- Cut the yarn and sew in the ends.
- Repeat these steps above along the other side.

If you liked this toddler crochet pattern you’ll love the Over The Top Crop. It’s a crochet crop top pattern that’s also great for beginners!
The Plain Jayne Baby Sweater Crochet Pattern has quickly became a favorite. Go check it out.
Thank you so much.
I loved your history and your Crochet !
I just would to ask you , how can I make one for me;..
I am 78 yrs and started to crochet in 2010.
I think the one you are showing is the one I would to make.
I am petite, 5:5 normal body .
God bless you abundantly.
Thank you for the kind words! If you would like to make an adult size sweater here’s the pattern.
https://sweeteverlyb.com/crochet-sweater-pattern/
Stay cozy,
Sierra
How long should the sleeves measure before you sew them on?
Oh never mind i see it now ? oops
Love this pattern!
Sure it will be my first crochet sweater, thank you. 🙂
Thank you! I can’t wait to hear how it goes! Enjoy the pattern.
Sierra